Adding Expiration Data to Products
Expiration data can be added to your products on the product's inventory batches page. You can also import expiration data in bulk or by scanning the product's barcode. There are 3 sets of data that can be provided:
- Inventory Batches
- Use Within Values
- Product Discounts
You can watch a short introduction video here.
Inventory Batches
Inventory Batches are the primary set of expiration data. The values provided will be assigned to orders, used to send expiration notifications, and determine when a product will be discounted. You can also display inventory batch information on your site.
When creating inventory batches the first thing to determine is when you want expiration data assigned to your orders. This can be done when the order is placed or when an order line item is fulfilled. See the "Assign inventory batches when" option below.
On the Add Product page, the Inventory Batches tab is where you will enter most of your expiration data. The options shown depend on your subscription. The most common are:
Assign inventory batches when
"Assign inventory batches when" specifies when an inventory batch is assigned to an order: when the order is placed or when an order item is fulfilled. The default is to assign when an order is placed. For example, if you're using the First Expiring, First Out (FEFO) inventory management method was being used the soonest expiring batch will be assigned to new orders. To configure what location is chosen see Order Batch Location Assignment.
Expires, Batch, Quantity, and Location
Expires is the expiration date for the given batch. Quantity is the amount available (though see Available vs on hand quantity below). Location is the Shopify location where the batch exists. Batch is the batch number. It's is optional. You can view the quantity available at Shopify for the given product or variant by clicking the "Quantity" link: 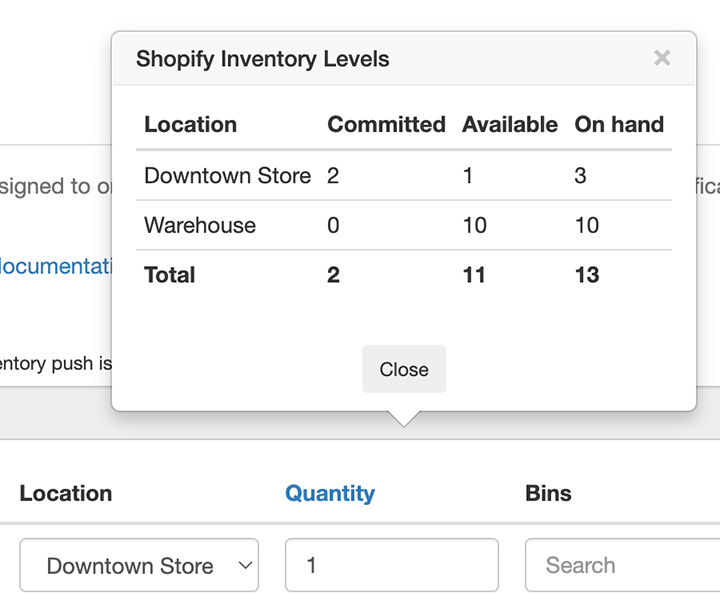
For example, Product A has a quantity of 10 in Shopify at the Warehouse location. Of this 10, 6 expires in 2025 and 4 expires in 2024. This results in the following entries into the app:
- Expires:
2025-01-01, Quantity:6, Location:Warehouse - Expires:
2024-11-21, Quantity:4, Location:Warehouse
Bin Locations, Invoice Number, Lot Number, Received At, Manufactured At, etc...
You can assign values to these by enabling their display on the Batches tab:
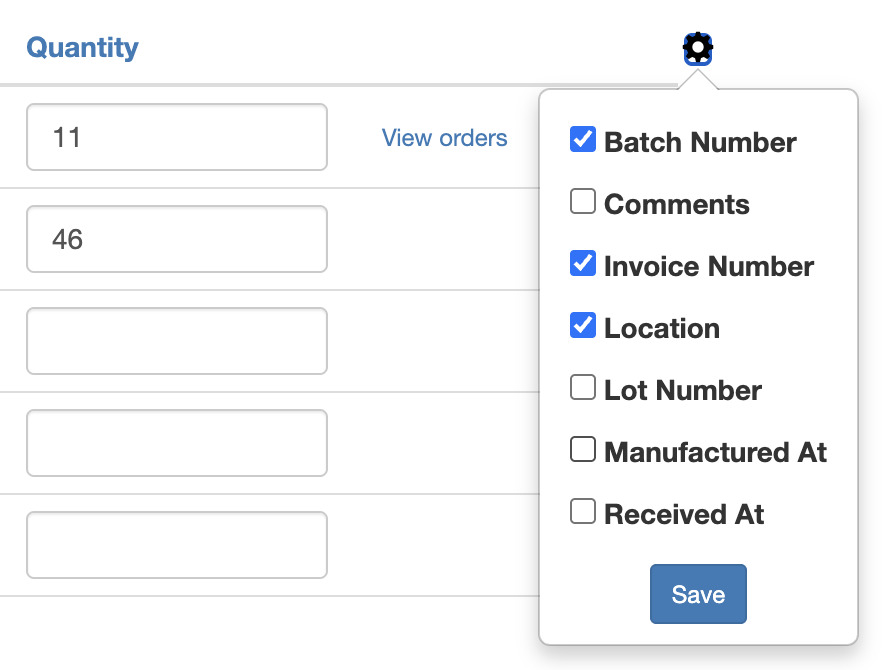
Select the desired field and click the Save button
Available vs on hand quantity
If you're using Inventory Push, you can either set the on hand or the available quantity. See the Inventory Push documentation for more information.
Configuring Fulfillment Locations
See Order Inventory Batch Location Assignment.
What happens next?
Let's assume you have entered inventory batch data for a product and selected "Order is placed" from the "Assign inventory batches when" option. Now, when an order is placed for that product, the app will assign the soonest expiring inventory batch from the location assigned to the order (for in-store orders) or, if the order does not have a location assigned, the app will assign the soonest expiring inventory batch from the values entered. If a line item is restocked/refunded/etc... its soonest expiring inventory batch is released and available to be assigned to future orders.
You can see what inventory batch has been assigned to an order on the app's Orders page
You can also display the expiration-related information on your site or add it to your packing slip or notifications.
Use Within Values
This is extra information that can be displayed on your site. It represents the time the manufacturer recommends using or consuming a product after it has been opened. For example, you can have best by July 1st 2025 from the Inventory Batches and Use within 30 days from here.
Product Discounts
Product discounts are available starting with the Premium Plan
We recommend using Rulesets to create product discounts. With Rulesets you can create multi-phased discounts which cannot be done with "old style" discounts specified via the settings or Discounts tab.
Product-specifc discounts can be entered on the Discounts tab. When an inventory batch is approaching its expiration date the product's price will be reduced by the provided percentage.
Default values for these fields can be entered on the Discount Settings page under the Product Defaults section. When adding new products to the app values entered here will be used to populate the fields on the Discounts tab.
To configure global discounts to use across all products see Selling Expiring Products for a Discount.