Review Request Email Domain Verification
To send review request emails using your email address and domain you must first verify that you own the domain. Verifying your domain allows recipients to see that an email is sent directly from you, and email providers are more likely to trust it. This helps improve deliverability, increasing the likelihood that your messages reach the inbox instead of being flagged as spam. The following screenshots show the difference between emails with and without a verified domain.
Without verified domain
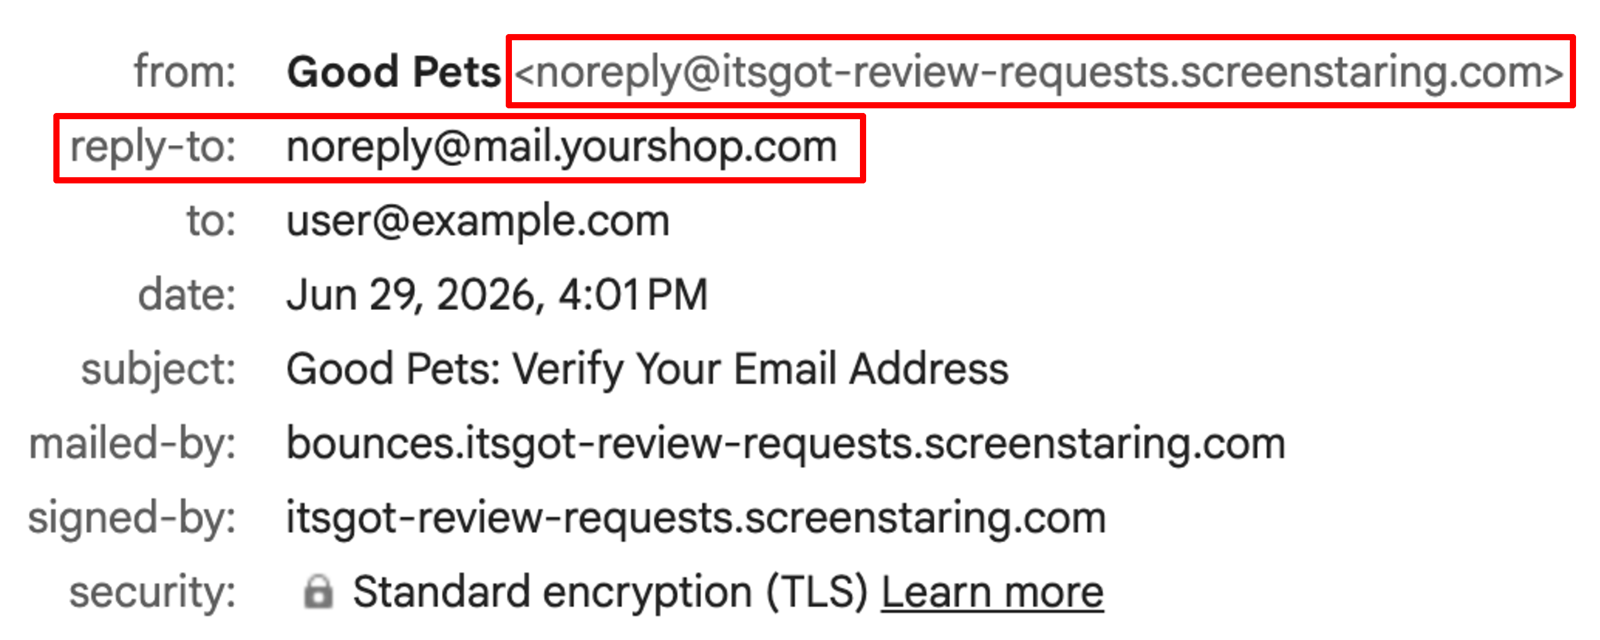
Note the From address uses the app's address and your site's email is used as a Reply-to address.
With verified domain
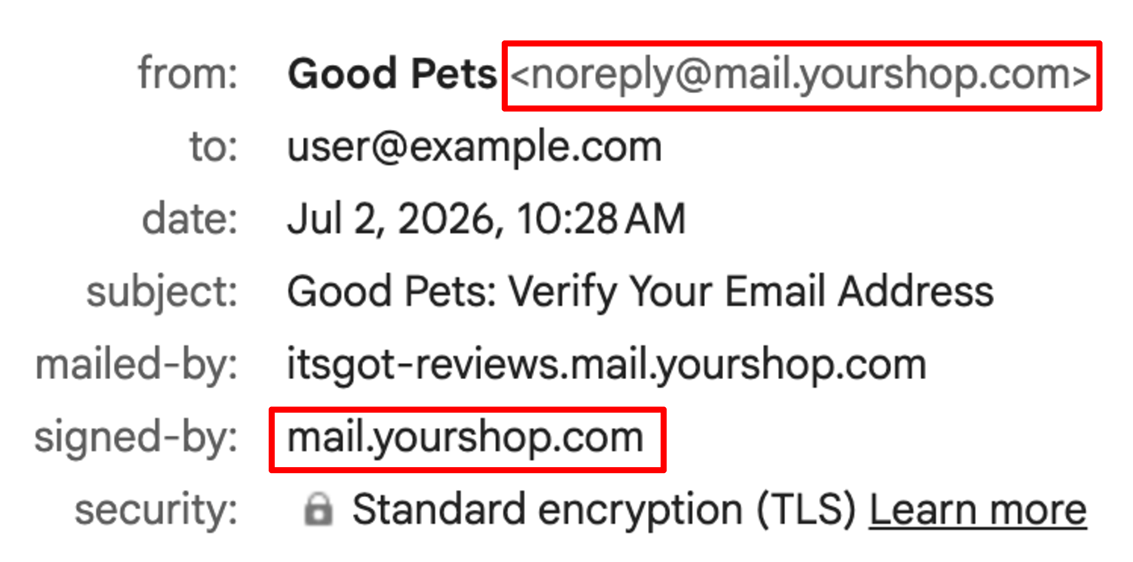
Using a verified domain allows one to use their custom address in the From field, removing the need for a Reply-to address.
Email domain verification is done by adding DNS records to your site's configuration that authorize our sending infrastructure. Once the domain is verified, the From email field on the review request email settings page will be enabled.
Verify Your Domain
- Go to the review request email settings page
- Click the Verify button next to the From email field
- Enter your sending domain (e.g.
mail.example.com) and click Register domain. - This will generate several DNS records that must be added to your domain's DNS settings. The records can be viewed by clicking the Verify domain button on the email configuration page.
- Add the previously generated records to your site's DNS configuration. For information see Adding Records to Your Site's DNS Configuration.
- Once the records have been added click the Records Added button on the verification page
- Wait for DNS changes to propagate and for verification to complete. This can take up to 24 hours. Once verified, the From email field will be enabled and you can set a custom sending address.
- You can monitor verification status from the review request email settings page
Adding Records to Your Site's DNS Configuration
Domain authentication relies on a handful of DNS entries that prove you control the domain you're sending from. Add these in your DNS provider's control panel while keeping this app open in another tab — you'll be copying values back and forth between the two.
Every DNS provider's interface looks a little different, so the field names mentioned here may not match exactly what you see. If you don't normally manage DNS for your organization, loop in whoever does — your IT team or hosting provider can usually add these records in a few minutes.
Once added give the changes a few minutes to take effect, then click Verify records from the review request email settings page.
Once the app confirms the record is in place, click Done to wrap up setup.