Combining Meal Components to Generate a Label
If you have a prepared meals or restaurant site you'll likely want to input your meal components once, and display a label based on the customer's selection. For example, if you offer a protein with a carbohydrate you want to generate a label based on the selection of each of these. If the user selects chicken and rice the label must contain the combined nutrients for chicken and rice. If they select chicken and baked potato the label must contain the combined nutrients for chicken and baked potato. Etc.
This can be achieved via the following steps:
- Create labels that are not associated with a Shopify product
- Create a label for the parent Shopify product
- Add Combine API code to your site
Create Labels That Are Not Associated With a Shopify Product
To be able to use meal components you must create a label with the Not associated with a Shopify product checked:
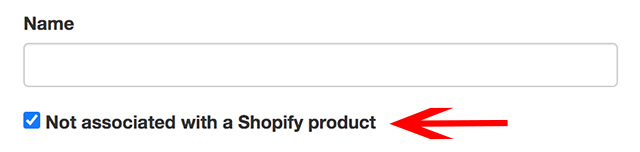
For Name, enter the name of the meal component exactly how it appears on your site, for example Sweet Potato Fries (Large). Afterwards proceed to enter the nutritional information and save the label.
Create a Label for the Parent Shopify Product
If the product is a bundle or container, i.e., something that does not contain nutritional data, for example, 10 day lunch plan, you can skip this part. If the product is a dish or meal component you must enter nutritional information for it too.
In this scenario you must not check Not associated with a Shopify product. Instead enter the first few characters of the product's name, select it from the list, and enter the nutritional information and save.
Add Combine API Code to Your Site
Once you've entered the nutritional information into the app you must add code to your site to retrieve and insert the label based on the customer's selection. This code must retrieve the selected variants and pass them to the It's Got combine API. This involves two steps:
1. Load the Combine API and Snippet
The snippet can be found on the settings page. Wherever this snippet is placed is where the label will be shown. It can be inserted anywhere on your site. Check out this example.
2. Retrieve the Selected Variants and Call the Combine API
This is what will load the label based on the selected variants into the snippet added in step 1 above. How to get the selected variants is dependent on your theme. There is no one-size-fits-all solution. You can contact support for guidance but first try the below example.
The Combine API requires making the following JavaScript call:
ItsGot.combine(components, options)
| Argument | Description |
|---|---|
components | An array of strings containing the meal components to build the label for. These values will come from the currently selected variants. |
options | Optional. An object that can contain the following properties: |
format - Format of the label to render. Defaults to us:2016:nutrition_facts:emblems. Other supported formats are: ca:legacy:nutrition_facts:vertical, de:eu:nutrition_facts:vertical, dk:eu:nutrition_facts:vertical, se:eu:nutrition_facts:vertical, uk:eu:nutrition_facts:vertical, us:2016:nutrition_facts:tabular, us:2016:nutrition_facts:vertical, us:legacy:nutrition_facts:vertical, us:legacy:supplement_facts:vertical_columns, us:legacy:supplement_facts:vertical, us:2016:supplement_facts:vertical_columns, and us:2016:supplement_facts:vertical | |
only - An array of nutrients to display. When specified only nutritional values for the provided nutrients will be shown. e.g., sodium, calories. Only valid for the us:2016:nutrition_facts:emblems format. |
Combine API Example
Add this to the product's description or to the appropriate Liquid file in the location you want the label to appear (note that the snippet for your account can be found on the settings page):
<script async="async" src="//itsgot.com/embed.js"></script>
<div data-itsgot-user="YOUR_ID" data-itsgot-combine></div>
Then, add this to the product (or similar) Liquid template:
<script>
  document.addEventListener('DOMContentLoaded', _ => {
    // ====================
    // NOTICE: getSelectedVariants() is an example and will not work with all Shopify themes.
    // How to get the selected variants is dependent on your theme. There is no one-size-fits-all solution.
    // ====================
    function getSelectedVariants() {
      return document.querySelectorAll('[class^=single-option-selector]');
    }

    function showLabel() {
      const components = [];

      getSelectedVariants().forEach(element => {
        if(element.value) components.push(element.value);
      });

      ItsGot.combineLabels(components, {
        format: 'us:2016:nutrition_facts:emblems',
        only: ['calories', 'protein', 'total carbohydrate', 'total fat', 'dietary fiber', 'total sugars']
      });
    }

    getSelectedVariants().forEach(element => element.addEventListener('change', showLabel));
  });
</script>